
Valentine’s Day Sugar Cookies – How to make Delicious 5

Table of Contents
Introduction
Looking to create a memorable Valentine’s Day treat that will impress your loved one? There’s nothing quite like the charm of homemade Valentines Day Sugar Cookies to express your affection. These delightful confections not only taste delicious but also carry the personal touch that store-bought options simply can’t match. Whether you’re a baking novice or a seasoned pro, this recipe will guide you through creating beautiful, heart-shaped cookies that are perfect for sharing with someone special. The Heart-shaped sugar cookies we’re about to create combine classic flavors with a romantic presentation that will make your Valentine’s Day celebration truly unforgettable. In this guide, we’ll walk you through every step of the process, ensuring your cookies turn out picture-perfect and absolutely scrumptious.
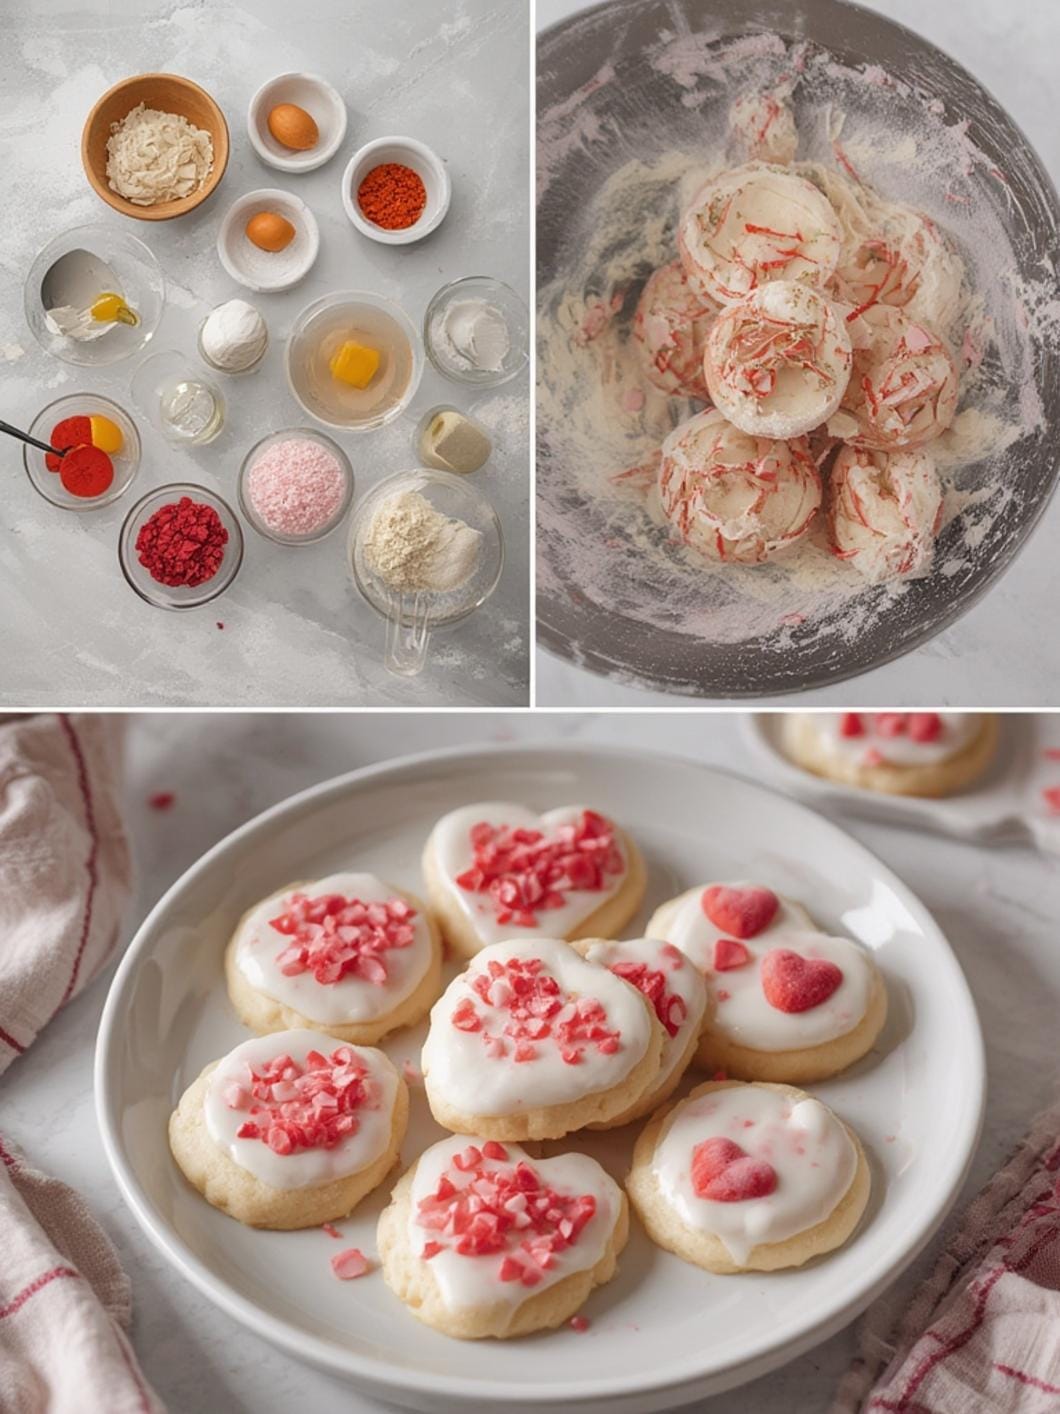
Ingredients & Supplies
Ingredients:
– 2 ½ cups all-purpose flour
– 1 teaspoon baking powder
– ½ teaspoon salt
– 1 cup unsalted butter, softened to room temperature
– 1 ½ cups granulated sugar
– 2 large eggs
– 2 teaspoons vanilla extract
– 1 teaspoon almond extract (optional)
– Food coloring in your choice of romantic colors (red, pink, purple)
– Decorative sugars, sprinkles, or edible glitter (optional)
– Royal icing or buttercream frosting (optional)
Supplies:
– Large mixing bowls
– Electric mixer (handheld or stand)
– Measuring cups and spoons
– Whisk
– Rolling pin
– Heart-shaped cookie cutters (various sizes)
– Baking sheets
– Parchment paper or silicone baking mats
– Spatulas
– Cooling racks
– Pastry bags (if using icing)
– Paintbrushes (for applying egg wash or coloring)
Optional Ingredients & Substitutions:
– For a vegan version: Substitute butter with vegan butter or solid coconut oil, eggs with flax eggs (1 tablespoon ground flaxseed + 3 tablespoons water per egg), and use plant-based milk.
– For a gluten-free option: Use a 1-to-1 gluten-free all-purpose flour blend.
– To reduce sweetness: You can reduce the sugar by up to ¼ cup, though this may affect texture.
– For a citrus twist: Add 1 teaspoon of lemon or orange zest to the dough.
– For spiced cookies: Add ½ teaspoon of cinnamon or nutmeg to the dry ingredients.
Timing / Cooking Schedule
Prep Time: 20 minutes
Chilling Time: 2-3 hours (or overnight for best results)
Baking Time: 8-10 minutes per batch
Cooling Time: 15-20 minutes
Total Time: Approximately 3-4 hours (plus chilling)
This recipe allows for flexible timing, making it perfect for Valentine’s Day planning. You can prepare the dough the night before and bake fresh cookies the morning of your celebration. The chilling time is crucial for preventing cookies from spreading, so don’t rush this step. Compared to other cookie recipes, the preparation is straightforward, though the chilling does require additional planning. For last-minute baking, you can reduce chilling time to 1 hour, though cookies may be slightly less crisp around the edges.
Step-by-Step Instructions
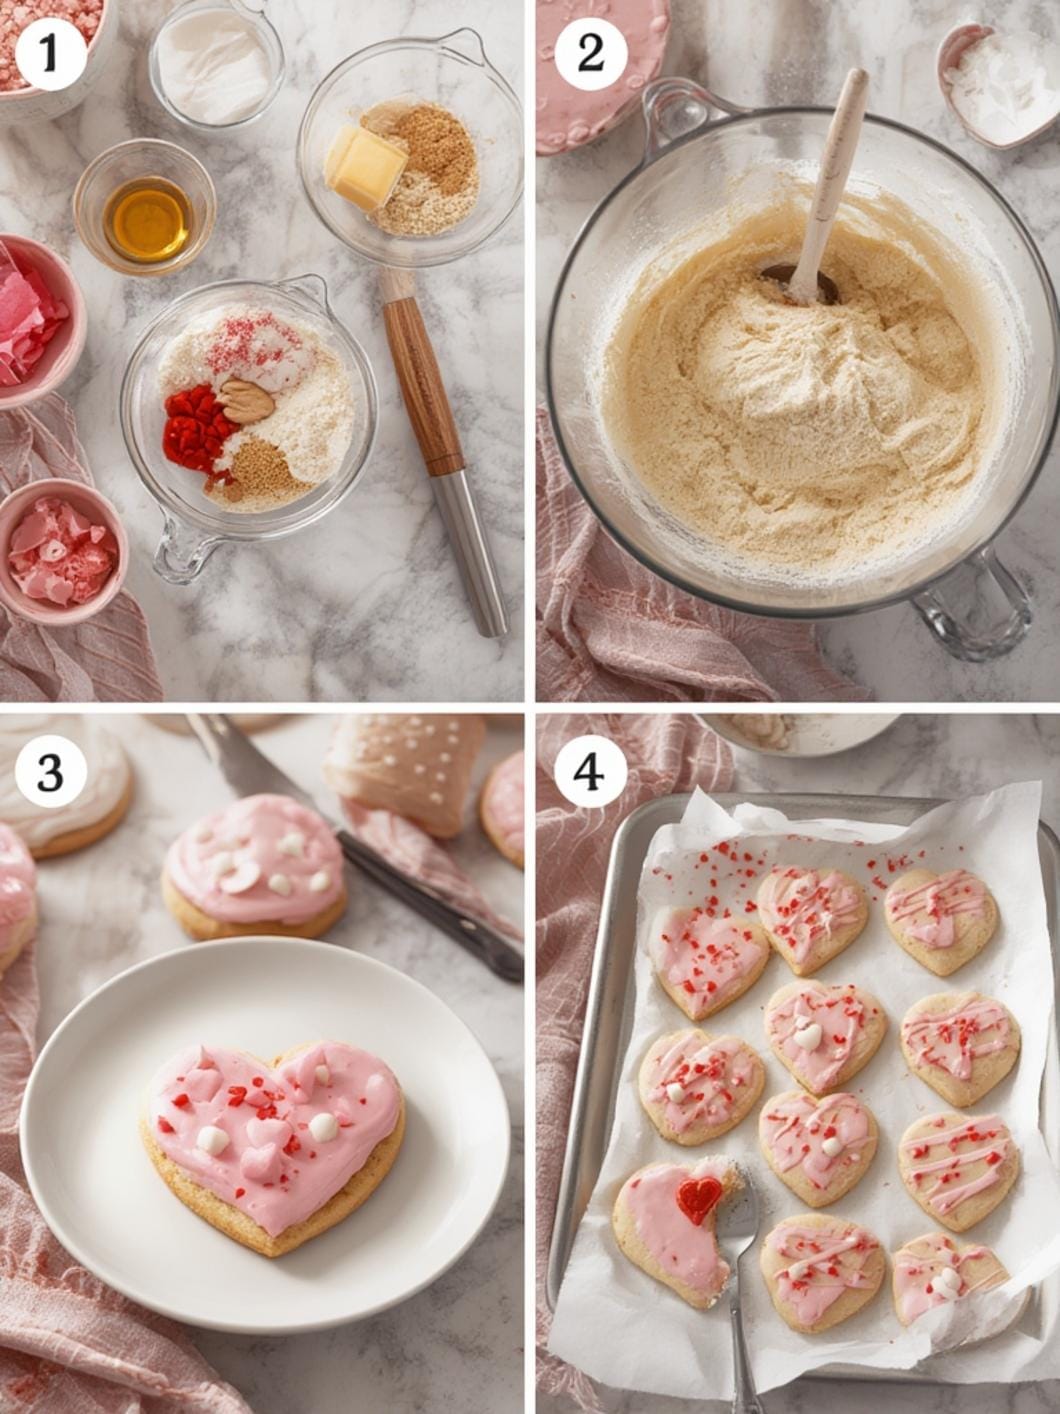
1. Prepare your workspace: Begin by gathering all ingredients and equipment. Preheat your oven to 375°F (190°C). Line your baking sheets with parchment paper or silicone baking mats.
2. Mix dry ingredients: In a medium bowl, whisk together the flour, baking powder, and salt. Set aside.
3. Cream butter and sugar: In a large mixing bowl, beat the softened butter and granulated sugar together using an electric mixer on medium-high speed until light and fluffy (about 3-4 minutes). The mixture should increase in volume and turn pale yellow.
4. Add eggs and extracts: Beat in the eggs one at a time, mixing well after each addition. Stir in the vanilla extract and almond extract (if using). The batter should be smooth and well-combined.
5. Combine wet and dry: Gradually add the flour mixture to the wet ingredients, mixing on low speed until just combined. Be careful not to overmix, as this can develop gluten and make cookies tough.
6. Color the dough: Divide the dough into portions if using multiple colors. Add a few drops of food coloring to each portion and knead gently until the color is evenly distributed. For vibrant Valentines Day Sugar Cookies, use gel food coloring which provides more intense color without adding extra liquid.
7. Chill the dough: Form the dough into a flat disk, wrap tightly in plastic wrap, and refrigerate for at least 2-3 hours, or preferably overnight. This step is essential for cookies that hold their shape and have a tender texture. Properly chilled dough will feel firm to the touch.
8. Roll out the dough: On a lightly floured surface, roll out the dough to about ¼-inch thickness. If the dough is too sticky, add a small amount of flour. For perfectly shaped Heart-shaped sugar cookies, ensure your rolling pin is evenly pressed to maintain consistent thickness.
9. Cut shapes: Use heart-shaped cookie cutters of various sizes to cut out your cookies. For a professional look, press the cutter straight down without twisting. Re-roll scraps and cut additional cookies, but be aware that re-rolled dough may be slightly tougher.
10. Bake: Carefully transfer cut cookies to prepared baking sheets, leaving about 1 inch between each cookie. Bake for 8-10 minutes, or until the edges are lightly golden but centers still look soft. The baking time may vary depending on your oven and cookie size.
11. Cool: Allow cookies to cool on the baking sheet for 2-3 minutes before transferring to a wire rack to cool completely. This helps them firm up and prevents breakage.
12. Decorate (optional): Once completely cool, decorate your cookies with royal icing, buttercream frosting, or simply dust with powdered sugar. Get creative with sprinkles, edible glitter, or drizzles of melted chocolate.
Nutritional Benefits / Advantages
While these cookies are undoubtedly a treat, homemade versions offer several advantages over store-bought alternatives. When you bake at home, you control the quality and quantity of ingredients, allowing you to create a more wholesome indulgence.
These heart-shaped cookies contain real butter, which provides natural fats and fat-soluble vitamins like A, D, E, and K. Using high-quality ingredients means you avoid the preservatives, artificial flavors, and hydrogenated oils often found in commercial cookies.
The almond extract, if used, offers not only flavor but also potential health benefits, including antioxidants and healthy fats. Additionally, homemade cookies allow you to adjust sweetness levels to your preference, potentially reducing the overall sugar content compared to mass-produced versions.
From a psychological perspective, baking and sharing homemade cookies creates meaningful connections and positive experiences, which contribute to overall well-being. The act of creating something special for someone you love releases endorphins and strengthens relationships.
Tips, Alternative Methods, or Cooking Advice
1. Cookie Variations:
– For crispier cookies: Extend baking time by 1-2 minutes and use all butter (no shortening).
– For chewier cookies: Replace half the butter with shortening and reduce baking time by 1-2 minutes.
– For flavored cookies: Add 1-2 teaspoons of citrus zest, 1 teaspoon of cinnamon, or ½ teaspoon of nutmeg to the dry ingredients.
2. Baking Method Alternatives:
– Convection oven: Reduce temperature by 25°F and check cookies 2 minutes earlier.
– Air fryer: Preheat to 320°F. Bake in batches for 5-7 minutes, watching carefully as air fryers cook faster.
– No rolling pin: Press dough between two sheets of parchment paper and use your hands to flatten to desired thickness.
3. Ingredient Swaps:
– Gluten-free: Use a 1-to-1 gluten-free flour blend with xanthan gum.
– Dairy-free: Use vegan butter or solid coconut oil instead of butter.
– Egg-free: Use flax eggs (1 tbsp ground flaxseed + 3 tbsp water per egg) or commercial egg replacer.
– Sugar-free: Use a granulated sugar substitute like erythritol or a blend that measures 1:1 with sugar.
4. Dietary Adaptations:
– Low-sugar: Reduce sugar by 25-50% and consider adding spices or extracts to enhance flavor.
– Nut-free: Ensure all extracts and food colorings are processed in nut-free facilities.
– High-protein: Add ¼ cup of protein powder to the dry ingredients, but note this will affect texture.
Common Mistakes to Avoid
1. Skipping the chilling time: Cold dough holds its shape better during baking. If you’re in a hurry, at least refrigerate for 1 hour, but overnight is ideal.
2. Overmixing the dough: Once flour is added, mix only until combined. Overmixing develops gluten, resulting in tough cookies instead of tender ones.
3. Using cold butter: Ensure butter is properly softened (room temperature) for creaming with sugar. Cold butter won’t incorporate properly, affecting texture.
4. Rolling dough too thick: Aim for ¼-inch thickness for cookies that bake evenly. Thicker cookies will be doughy in the center, while thinner ones may burn.
5. Overbaking: Sugar cookies should appear slightly underdone when removed from the oven as they continue cooking on the hot pan. Look for lightly golden edges rather than overall browning.
6. Moving cookies too soon: Let cookies cool on the baking sheet for 2-3 minutes before transferring to a wire rack. This allows them to set properly.
7. Using too much flour when rolling: Excess flour dries out the dough. Lightly flour your surface and rolling pin, or use parchment paper to prevent sticking.
8. Inconsistent sizing: Cookies of different sizes will bake at different rates. Try to keep similar-sized cookies together on a baking sheet.
Storage / Maintenance Tips
Room Temperature Storage:
Store cooled, undecorated cookies in an airtight container at room temperature for up to 1 week. Place parchment paper between layers to prevent sticking. Decorated cookies should be consumed within 3-4 days.
Refrigeration:
For longer storage (up to 2 weeks), keep cookies in an airtight container in the refrigerator. Bring to room temperature before serving for the best texture.
Freezing:
– Unbaked dough can be refrigerated for up to 3 days or frozen for up to 3 months. Thaw in the refrigerator overnight before using.
– Baked cookies (decorated or undecorated) freeze well for up to 2 months. Freeze in a single layer on a baking sheet, then transfer to an airtight container or freezer bag. Thaw at room temperature.
Freezer-Friendly Tips:
– Flash-freeze unbaked cookies on a baking sheet before storing in bulk
– Use freezer-safe containers or bags
– Label with contents and date
– Decorate frozen cookies before baking if desired
Meal Prep:
– Prepare dough up to 3 days in advance
– Cut out shapes and freeze on baking sheets, then store in freezer bags
– Bake as needed for fresh cookies anytime
– Prepare icing in advance and store in an airtight container at room temperature for up to a week
Conclusion
Creating homemade Valentines Day Sugar Cookies is a wonderful way to show your love and creativity this Valentine’s Day. The process of making these Heart-shaped sugar cookies is not only rewarding but also allows you to craft personalized treats that will delight your loved ones. Remember that practice makes perfect, so don’t be discouraged if your first batch isn’t picture-perfect – the love and effort you put into baking will shine through in every bite.
These cookies offer a perfect blend of nostalgia and romance, combining classic flavors with a beautiful presentation that captures the essence of Valentine’s Day. Whether you’re an experienced baker or trying your hand at sugar cookies for the first time, this recipe provides clear instructions to guide you through each step.
We’d love to hear about your baking experience! Share your decorated cookie creations on social media using #ValentineCookies and tag us @SipRecipes. For more romantic dessert ideas and baking inspiration, explore our collection of Valentine’s Day treats on our blog. Happy baking and a very sweet Valentine’s Day to you and yours!
FAQs
1. Can I make the dough ahead of time?
Absolutely! The dough can be refrigerated for up to 3 days or frozen for up to 3 months. Thaw frozen dough overnight in the refrigerator before using.
2. Why did my cookies spread during baking?
This typically happens when the dough is too warm or when you use too much flour when rolling. Ensure your dough is well-chilled and use minimal flour when rolling out.
3. How can I get sharp edges on my heart cookies?
For crisp edges, use all butter in your dough and don’t overbake. Chilling the dough thoroughly and using a sharp cookie cutter also helps maintain defined shapes.
4. Can I use this recipe for cut-out shapes other than hearts?
Yes! This recipe works beautifully for any cut-out shape. Simply use your desired cookie cutters instead of heart shapes.
5. What’s the best way to decorate these cookies?
Royal icing creates a professional finish, but simple dusting with powdered sugar or a light glaze also looks lovely. For best results, decorate cookies when completely cool.